Children's Bedroom and Nursery Curtains.
How to Measure for Nursery Curtains
Measure Curtain Width
Since both our styles of curtain (eyelet or pencil pleat) both make use of a curtain pole, measuring the width required for each curtain is very simple. You just need to measure from each end of the pole, please note this is not including any ornamental ends – or ‘finials’ as they’re professionally known!
It’s also worth noting at this point that although you’re measuring the entire width, this is the measurement for one individual curtain. However to make it as easy as possible for you on the site you don’t need to overly worry about as we have factored this into each product page so you only need to type in these measurements once and the price shown will automatically be for a pair of curtains in your size.

Choose Drop Length
Before measuring the curtain length, you need to decide on which style you want to go for, there are three options here : above sill, below sill, floor length.
a b
b  c
c
a. Above Sill
The above sill style give a little light beneath the curtain and looks most appealing when it measures exactly 1cm above the windowsill.
b. Below Sill
The below sill is the most common length of curtain and should be around 15cm below the bottom edge of the windowsill.
c. Floor Length
This is quite ‘elegant’ in style since a floor length curtain carries a true regal feel and should measure exactly 1cm off the floor.
Choose Heading Type
Once you have chosen which length you prefer, you then need to choose whether you want to have an eyelet or pencil pleat style curtain. Each is measured slightly differently so you must ensure to make a decision before measuring.


How We Make Nursery Curtains
All of our nursery curtains are hand-made, bespoke to your specific measurements. We’ve taken the time to explain a little more about the process and attention to detail that goes into every single one of our handmade curtains below.

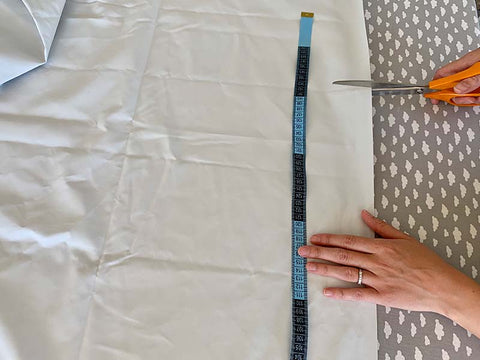
1. Measure and Cut the Fabric
We make our curtains 2x the width of the window for a luxurious, full pleated finish, therefore each finished curtain is made to the width of the window. Allowing for hems we cut our fabric widths along the pattern, ensuring the pattern matches accurately across each width.

2. Join Widths
When necessary, we join fabric widths to give the required total width. The pattern is matched meticulously to ensure the finished join is as subtle as it can be. This requires a steady hand and lots of patience and focus!
3. Hems
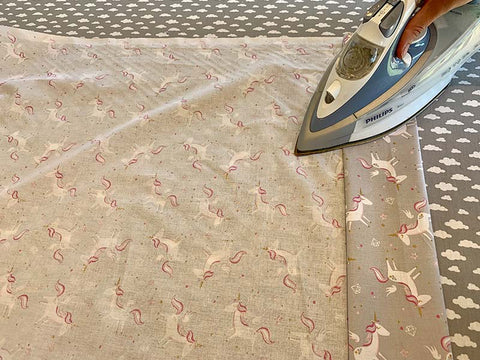
Fold, iron and hand sew bottom hems.
4. Lining
Cut lining widths and join widths of lining if necessary. Fold, iron and hem lining.

5. Join Lining and Fabric
Leaving a gap of 1-2 inches between the edge of the lining and the edge of the fabric, we sew the lining and fabric together using a strong, durable stitch for a neat, even finish and a long lasting pair of lined curtains.

6. Iron Top Hem and Add Header
Depending on the customer’s choice of header, we add either a pencil pleat or eyelet tape to the top of the almost finished curtain, then either neatly tie the strings of the pencil pleat tape, or insert the eyelets. If your curtain has a pencil pleat header, you simply pull the strings to form the pleats, then tie the strings again to retain the pleats. If you have an eyelet header you are all ready to go- no tweaking required!
To view our range of beautiful children's bedroom and nursery curtains, click here.